Posts

Showing posts from September, 2017

SMTP Server Configuration In DSpace | Code Factory

Image
Download DSpace  :   Download. - Stop tomcat - Open dspace.conf (D: -> dspace -> config)   -  Edit properties or uncomment it mail.server = smtp.gmail.com mail.server.username = username@gmail.com mail.server.password = PASSWORD mail.server.port = 465 mail.allowed.referrers = localhost mail.extraproperties = mail.smtp.socketFactory.port=465, \ mail.smtp.socketFactory.class=javax.net.ssl.SSLSocketFactory, \ mail.smtp.socketFactory.fallback=false -  Start tomcat ( NOTE : If you change <dspace-x.x-src-release> -> dspace -> config -> dspace.conf then you must Build and Configure the dspace and then start tomcat ) Tags : DSpace tutorial DSpace SMTP server setup for enabling Emails Dspace Gmail SMTP Configuration Configure Gmail on Dspace How to configure smtp email settings in DSpace Configure SMTP mail server On Dspace
WYSIWYG Editor In DSpace | Code Factory

Image
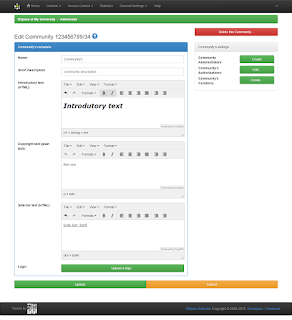
Download DSpace :  Download. In order to allow HTML in item metadata, we propose the inclusion of a WYSIWYG editor during Describe Step. This addition would allow a user to enter rich text as metadata value. Here are some case scenarios: Allow abstracts with some visual styles like bold, italic Allow free HTML Also, it would allow the use of additional plugins like Latex formulas. To add WYSIWYG editor in DSpace, an easy and good option is adding online .js to any page because DSpace doesn't have any plugin. Add online .js in header-submission.jsp (<tomcat> -> webapps -> jspui -> layout), it adds WYSIWYG editor in all pages. If you want to add WYSIWYG editor to only for particular page then add .js to page where you want this editor like add .js to edit-community.jsp  (<tomcat> -> webapps -> jspui -> tools)  Add this code to your JSP page. <script src="https://cloud.tinymce.com/stable/tinymce.min.js">&

Create Community, Sub Community and Versioning in DSpace | Code Factory

Image
Download DSpace :  Download. Start and Create Versioning in DSpace : Step 1 : Stop tomcat. Step 2 : Go to <dspace-x.x-src-release> -> dspace -> config -> modules -> versioning.cfg and then make all false to true. Step 3 : Build and configure DSpace and Start tomcat Step 4 : Go to URL : http://localhost:8080/jspui             Click on any submitted collection from the below on HOME.             Select "Create version of this item" or "Show version history". Tags : DSpace tutorial Create Community, Sub Community and Versioning in DSpace Create versioning in dspace  Item level versioning Item Versioning Support

How to Install DSpace on Windows | Code Factory

Download DSpace :  Download. How to Configure DSpace in Windows Using CMD : Step 1 : Download DSpace from the above link. Step 2 : First download these softwares and install on your machine.      1) apache-ant-x.x.x-bin      2) apache-maven-x.x.x      3) Java and Tomcat      4) PostgreSQL Step 3 : Login in PGadmin and create user : dspace and password : dspace with full role. Step 4 : Create database with name dspace with dspace user role. Step 5 : Go to location <dspace> -> dspace -> config and then copy file local.cfg.EXAMPLE and paste at same location and rename it with local.cfg Step 6 : Now remove all blank lines from the local.cfg and dspace.cfg Step 7 : Create a extension in postgre in dspace database. CREATE EXTENSION pgcrypto; commit; Step 8 : CMD : <dspace> -> dspace -> mvn package Step 9 : CMD : <dspace> -> dspace -> target -> dspace-installer -> ant fresh_install Step 10 : Pr

How To Add Language To DSpace? | Gujarati Language in DSpace | Code Factory

Image
Download DSpace :  Download. Steps for add another language in DSpace : Step 1 : Stop tomcat. Step 2 : Go to <dspace-x.x-src-release> -> dspace -> config -> local.cfg and add / change default.language = gu_IN default.locale = gu webui.supported.locales = gu, en Step 3 : Go to <dspace-x.x-src-release> -> dspace -> config -> dspace.cfg and add / change default.locale = gu webui.supported.locales = gu, en Step 4 : Go to <dspace-x.x-src-release> -> dspace-api -> src -> main -> resouces and copy Messages.properties and rename it to Messages_gu.properties and change values according to requirements ( Convert english text into gujarati text and then convert gujarati text into uni code ).       English to Gujarati convert :  Link.       Gujarati to uni code convert :  Link.  (Note :  Select text from the  JavaScript textbox ) Step 5 : Eclipse -> dspace -> right click -> run as -> runconfiguration ->